
Trim your candle wick to about 1/4 inch before lighting it. That single habit keeps the flame steady, cuts down on soot, and stretches every candle’s burn life. The National Candle Association backs this length as the standard for jar candles, and Starsandcents builds it into every care instruction that ships with our soy candles.
TL;DR:
- Regularly trimming the wick to about 1/4 inch prevents excess soot, unstable flames, and improves candle performance for jar candles.
- After long burns or if the flame is tall or smoky, a trim is especially necessary to prevent mushrooming and tunneling issues.
- Using a dedicated wick trimmer offers better reach and cleaner cuts compared to scissors or nail clippers, especially as the candle burns down.
- Fix common problems like mushrooming, soot, and tunneling by trimming, removing debris, and adjusting burn time; avoid forcing candles that won’t relight.
- For soy and coin candles, follow specific trimming advice, including checking for debris near embedded surfaces to maintain aesthetic and fragrance quality.
Table of Contents
- Why Trim a Candle Wick Before Every Burn?
- When and How Often Should You Trim a Wick?
- How to Trim a Wick: Step-by-Step Procedure
- Wick Trimmers vs. Scissors vs. Nail Clippers: What Actually Works
- Fixing the Most Common Wick Problems
- How Starsandcents Recommends Caring for Soy and Coin Candles
- Trusted Resources on Candle Wick Care
- Why This Small Habit Changes How a Candle Performs
- Sources
Why Trim a Candle Wick Before Every Burn?
A wick left too long doesn’t just look messy. It pulls more fuel than the flame needs, and that extra wax turns into soot instead of light and scent.
Soot is the visible proof of a wick doing more work than it should. It streaks glass jars, dulls the room’s air quality over time, and settles on furniture near the candle. An overlong wick also produces a taller, less stable flame, which raises the risk of flare-ups near curtains, books, or anything flammable nearby.
Trimming fixes both problems at once. Martha Stewart’s guide to wick care notes that a properly trimmed wick burns wax more evenly, which means less gets wasted as smoke and more comes through as fragrance. That’s the difference between a candle that fills a room and one that barely registers after twenty minutes.
Two visible signs tell you trimming is overdue:
- Mushrooming: a black, bulbous cap forms at the wick’s tip, a clear signal from CandleScience’s troubleshooting guide that carbon buildup is choking the flame.
- Tunneling: the candle burns a narrow well straight down the middle, leaving wax stranded along the jar walls.
Catch either early, and a quick trim usually gets the burn back on track.
When and How Often Should You Trim a Wick?
Trim before every single burn. That’s the rule, and it holds regardless of how long the candle has been sitting unlit since the last time.
A wick grows a little each time it burns. Even a candle that looked fine when you blew it out last night will have a slightly longer, slightly charred tip by the next lighting. Skipping the trim just lets that buildup compound.
A few situations call for extra attention beyond the standard routine:
- After a long burn (two hours or more), check the wick even if you’re not relighting right away.
- If the flame looks noticeably taller than usual or you see smoke curling off the tip, trim before continuing.
- Heavily scented candles, including most soy blends, tend to shed more soot as wax fragrance oils burn off, so inspect the wick more closely with these.
- Wood wicks behave differently than cotton wicks and often need a shorter maintenance interval; our comparison of wood wick and cotton wick candles breaks down the practical differences.
Whatever the packaging says, follow it. Manufacturer instructions account for that specific wax blend and wick construction, and they override general guidance every time.
How to Trim a Wick: Step-by-Step Procedure
Trimming takes less than a minute once you know the sequence. Rush it, though, and you risk a lopsided cut or hot wax splashing where it shouldn’t.
- Let the wax cool and fully solidify. Warm wax is soft and the wick itself can still be pliable, which makes for a bent, uneven cut and risks denting the wax surface. Wait until the candle has been out long enough that the entire top layer is firm to the touch.
- Inspect the wick tip. Look for a mushroomed cap, a curled or leaning tip, or any charred fragments clinging to the wick. This tells you exactly how much needs to come off.
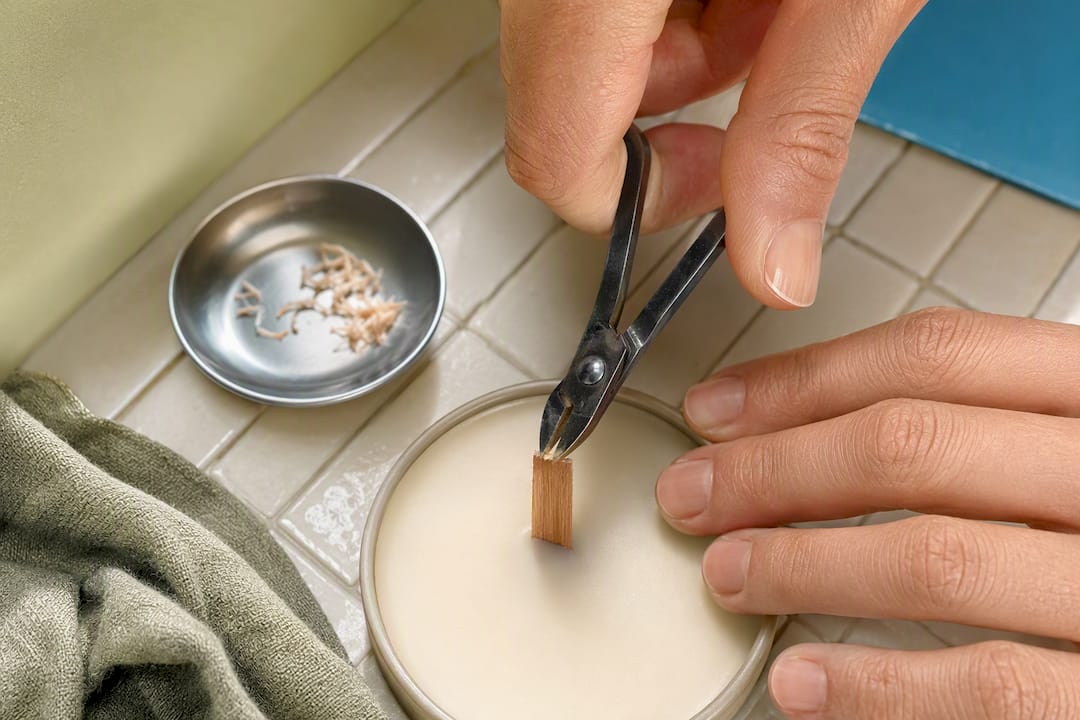
- Measure and cut to roughly 1/4 inch. That’s the standard the National Candle Association recommends for most jar candles. Tapered candles sometimes call for a shorter 1/8 inch trim, and wood wicks often have their own recommended height, so check the product label if one is included.
- Make one clean, decisive cut. Sawing back and forth frays the wick and leads to an uneven flame. A wick trimmer’s built-in chamber catches the clipped piece automatically; without one, catch it with a tissue so it doesn’t fall into the wax pool.
- Clear the wax surface before relighting. Check for any stray ash, wick fragments, or debris sitting in the melt pool and remove them. Anything left behind will smoke or char the next time you light the candle.
Pro Tip: Trim right after blowing out the candle from its last burn, once the wax has firmed up but before you forget. Building it into the same moment every time turns it into a habit instead of a chore you have to remember later.
Wick Trimmers vs. Scissors vs. Nail Clippers: What Actually Works
A dedicated wick trimmer earns its keep mainly on reach and cleanup. Its angled, scissor-like blades are built to slide down into a jar candle without your knuckles hitting the rim, and most models include a small chamber that catches the clipped piece before it lands in the wax. LAFCO New York points out that this becomes especially useful once a candle has burned down several inches and the wick sits well below the jar’s edge, a spot where household scissors struggle.

Scissors and nail clippers aren’t disqualified, though. On a brand new candle with a shallow wax pool, either works fine, since you can see and reach the wick easily. The limitations show up as the candle burns down: scissors angled awkwardly into a deep jar are more likely to drop the clipped piece straight into the melt pool, undoing the point of trimming at all.
Wood wicks are a separate case. They often need a different trim height and a slightly different technique than cotton wicks, since the wood fibers can fray rather than cut cleanly with a dull blade. Whichever tool you use, keep the blades sharp and wipe off wax residue and char after each use. A gummed-up blade crushes the wick instead of cutting it, which brings back the exact fraying problem you’re trying to avoid.
Fixing the Most Common Wick Problems
Most wick complaints trace back to one of a handful of causes, and nearly all of them respond to the same fix: trim, clear debris, relight.
- Mushrooming: that black, rounded tip is one of the clearest signs a wick needs attention, according to CandleScience’s own troubleshooting notes. Trim it off and the next burn should run cleaner.
- Soot on the glass: usually a byproduct of an overlong wick or a draft bending the flame against the jar wall. Trim first, then check for airflow from vents, windows, or ceiling fans.
- Tunneling: comes from short burns that never let the wax pool reach the jar’s edge. Let the candle burn long enough on its next few uses for a full melt pool to form, which helps the wax level out.
- Wick cut too short or buried in wax: don’t panic. Let the candle burn briefly to soften the surrounding wax, then gently clear wax away from the wick base with a toothpick or wooden skewer until enough is exposed to light.
- Wick fragments in the melt pool: fish them out with a tissue or toothpick before relighting. Left in place, they scorch and add extra smoke and soot to the next burn.
A quick habit check goes a long way here: trim before every burn, keep candles away from drafts, and don’t burn beyond the maker’s recommended window per session. If a candle won’t relight even after clearing wax and exposing the wick, or the wax has darkened and smells off, stop using it and dispose of it rather than force a burn.
How Starsandcents Recommends Caring for Soy and Coin Candles
Soy wax burns cooler and tends to pool more evenly, but it still needs that same 1/4 inch trim before each lighting to avoid soot buildup and keep the fragrance throw strong.
A few product-specific notes worth knowing:
- For our cotton wick jars, the standard 1/4 inch trim before every burn applies exactly as described above.
- For wood wick styles, trim a little more conservatively and check the wick’s edges for fraying, since wood responds differently to a dull blade than cotton does.
- For our coin candles, clearing wick debris matters even more as the wax burns down toward the embedded silver coin. Stray fragments near the coin can scorch or discolor the surface right as it’s about to reveal itself, so a clean trim and a quick check of the melt pool protect that moment.
For a deeper look at getting the most from your soy candle’s full burn life, read our guide on how to get the most out of your soy candle.
Trusted Resources on Candle Wick Care
For deeper reading beyond this guide, a few sources stand out. The National Candle Association’s burning guide covers general safety and burn practices beyond just trimming. LAFCO New York’s breakdown of wick trimmers explains why the tool outperforms scissors on deep jars. Martha Stewart’s wick trimming guide offers a broader look at burn efficiency. For troubleshooting specific wax and wick issues, Latvian Candles’ troubleshooting basics is a solid practical supplement.
Why This Small Habit Changes How a Candle Performs
The biggest misconception about wick trimming is that it’s a fussy extra step reserved for candle enthusiasts. It isn’t. It’s closer to changing the oil in a car: skip it and nothing breaks immediately, but the performance quietly degrades every time you don’t do it.
What surprises most people is how much of the “bad candle” experience, weak scent, sooty glass, an uneven burn, traces back to a wick nobody trimmed rather than a flaw in the wax or the fragrance oil itself. We see this constantly with our own soy candles. The wax and fragrance load are the same from jar to jar, yet the burn experience varies wildly depending on whether the person lighting it took fifteen seconds to snip the wick first.
If you take one thing from this guide, let it be this: the trim matters more than the tool you use to do it. A pair of kitchen scissors and a little consistency will outperform an expensive trimmer used once a month. Check our soy candle collection or try the Sea Salt & Orchid wood wick candle if you want to put this into practice on a candle built with that kind of care already baked in.
— Zach
Sources
- Your foolproof guide to burning a candle correctly — National Candle Association
- Why You Should Be Using a Candle Wick Trimmer — LAFCO New York
- How and when to trim a candle wick to ensure an even burn — Martha Stewart